Lawn & Garden
Top 8 Things to Not Do with Your Sprayer
Friday, 01/03/2025
In my travels I’m able to conduct landscape consultations from seed-to-shining seed! I may visit gorgeous homes, large businesses or hold simple tailgate meetings. There’s this one thread that they all have in common: the unusual ways they treat their sprayers. Ugh!
Sprayers. Not the same ol’ metal one grandpa used for killing weeds with Paraquat, to applying fungicide on roses then filling it up with Dichlorodiphenyltrichloroethane (DDT) to kill ants all within an hour of each other. In those days the same sprayer was used for everything and within two to three months it would be rotted out, gummy and filled with all kind of chemical reaction nasties inside and outside of it. Although the times have changed there are so many things I see during my travels that brings me back to the days of grandpa’s sprayer and the Top 8 Things NOT to do with/to Your Sprayer.
I’m always preaching to use the right tool for the right job. It sure helps in the big scheme of things to work easier and more efficiently. When it comes to sprayers we have so many choices: trigger, hand pump, backpack, ATV/tow sprayers and even battery powered to name a few. And, grandpa would be happy to know metal sprayers are still made for a variety of applications. The materials sprayers are made out of depend on what it is you are spraying from herbicides, insecticides to good ol’ fashion water.
1. Don’t Store a Sprayer without Cleaning It.
Once you select your organic, natural or chemical potion to attack insects, disease, etc. the amount diluted seems quite small, right? Let’s say it’s only one tablespoon per gallon of water. That minute amount will kill bugs and your sprayer if you store that concoction in your sprayer. Storing that mixture can clog up the sprayer which is the #1 reason for sprayer failure. The water you use is designed to activate and/or spread the material. It’s made to be used right away not stored otherwise a separation may occur, coagulation, a film builds up (ie. glyphosate), it’ll turn gummy plus eat away at the sprayer parts.
Need tips on how to clean your sprayer? Check this out! 3 Simple Steps
2. Cover Me Up!
You might not equate donning protective clothing with using a sprayer but it’s a real thing that can save your life. Body parts aren’t replaceable and regardless if you’re using organic, natural or chemical solutions you need to make sure you are protected: goggles, face mask, chemical resistant gloves, long sleeve shirts and long pants is styling when spraying. You really can’t be over-dressed for the occasion (bowtie is optional).

3. “What’s in a name?”
I’m thinking Bill Shakespeare had Juliet actually say that because Romeo was mixing all kinds of chemicals in his sprayer. What you put in a sprayer is as important and what you don’t. For instance, remember grandpa putting glyphosates in the metal sprayer? That’s a chemical that’ll eat and rust way at the metal. If you’re spraying vinegar you’re going to want a sprayer that can handle the acid so the sprayer lasts for a very long time and there’s a sprayer for that! Sprayers are so reasonable now that you can afford to clearly label what it is supposed to be used for. Make sure the classification of what you are using is proper. For instance, there are soil sterilants for weed control and selective herbicides that will pinpoint the weeds you want to kill and not the whole grass. The name of what you are using is important and should be clearly marked on the sprayer to not cross contaminate.

PRO TIP: Properly label what’s in a sprayer before you spray. Never stick your nose in a sprayer tank to ‘smell’ what’s inside.
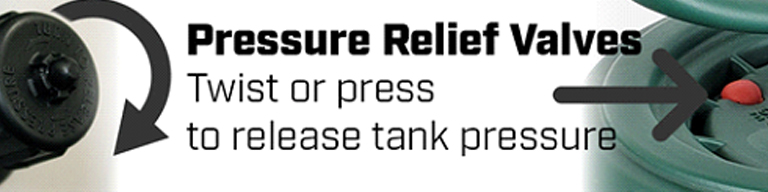
4. The Pressure Is Killing Me!
Directions on how many times to pump the sprayer always come with your instruction manual when you buy a sprayer. Many of the sprayers will have a pressure relief valve. This is particularly important when you are taking a break or need to juice up the sprayer again. Typically, you lift the valve, and the pressure is released without having to fight the lid to take it off. This is important for contractors that are using the sprayer on and off during the day. You don’t want to have a pressurized sprayer bouncing around the back of your truck. And, when pressurizing it, don’t over pump it!
PRO TIP: Be aware of your surroundings when spraying. Keep children and pets away as per manufacturers’ recommendations on solutions you spray. That could be until it dries or a few days!
5. The Upside Down Sideways Sprayer.
You know you’ve done it. You’re running late and you finger flick the sprayer and it lands on its side. Or worst – upside down! I think a classic look is when a sprayer is flung in a cardboard box and whatever is inside oozes and saturates the box. If you don’t have gloves on the next time you touch that box pay attention to how your fingers are tingling! Take the time to set your sprayer upright whether it’s going in your truck, trunk or on a shelf. The design of a sprayer is to be upright at all times.
6. Don’t be a Drip!
There really aren’t a lot of parts to a sprayer but the parts can wear down, be improperly installed or just dirty. Every sprayer typically comes with a schematic so you can identify the parts. It’s horrible to see a sprayer that’s leaking while you spray from the nozzle tip to the wand connections and even the trigger. Sometimes it’s as simple as hand tightening, replacing an O-ring/washer or tightening a screw. Because of the schematic you can easily go on-line to order sprayer parts as they are replaceable. Don’t be a drip!
7. Don’t Get Bent Out of Shape.
The wand of a sprayer has got to be one of the most abused parts of the sprayer. I’ve seen them twisted into all kinds of configurations: up, down, sideways, s-shaped and even figure 8. Sprayer wands are made of different materials from poly to different forms of metals. Nearly all sprayers will have a fancy notch molded on the sprayer to keep it in an up and down position. This is to keep it in shape and out of way from sitting, stepping, and getting it stuck under something. Keep the wand straight and you’ll probably hit your target easier, too. Oh, and if it does get out of shape replacement parts can be found.
PRO TIP: Multiple Chapin sprayers have notches or clips to store the wand, backpacks ATV, hand pump sprayers.
8. Let’s Not Get Kinky.
You have to remember that a sprayer hose is under pressure when it gets pumped up. They are designed to handle the force but a kinked hose will surely become weakened to the point pin holes or even complete breakage will occur. This is another case of being careful not to kink it, put a gas can on it or run over it with your lawnmower. Take the time to loop it around or roll it up when putting the wand back in place.
There’s a sprayer for every type of need. Do your homework and select the one that makes sense and use it properly!

Watch a few tips from Nick on caring for your sprayer!
Nick Federoff
ThingsGreen.com
Horticulturalist for PBS|KLCS TV, CBS|KCAL News and Syndicated Radio Talk Show Host
